Hello everybody 🙂
Firstly, thank you soo much for my followers who have been giving me feedback and commenting/liking my posts it really means a lot to me, please feel free to give me any sort of feedback you feel about my posts or any suggestions on what I should post. Today`s blog posting is centered around a gift I received its the “Models Own Kohl Eyeliner Pencil”, Models Own is a British company that has a lot of branches around the world but is vastly expanding in the middle east particularly in places such as Saudi Arabia and Dubai, they`re products contain a vast range of nail polishes as well as a makeup range. I really like the pencil, particularly the chestnut color, I like the thought of a potential sultry embellished look. So i decided to experiment a little bit and use it as a tool to sharpen my eyebrows.
The products I used to complete my look were the following (in order of usage):
1.Models Own Kohl Chestnut Eyeliner Pencil (3.99 Pound Sterling)
2.Revlon Photo Ready Concealer
3.Mini Bourjois (light brown) Mascara
4.The Body Shop Extra Virgin Mineral loose powder shade- 102 natural ivory
Eyebrow Tutorial
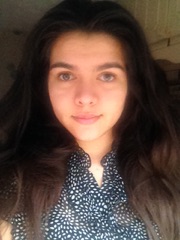
1. Make sure your face is dry and clean below is a photo of me without any makeup on at the start.
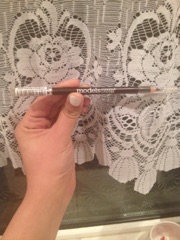
2. This is the models own eyebrow pencil
3. Start by using a brush or in my case the smudger to align next to your nose so you have an idea of where the edges of your eyebrows are. In addition, you could line the brush to an approximately 65 degree angle if that is easier !
4. Use the pencil and do gentle pencil strokes from the beginning of your eyebrow to the ends depending on your eyebrows. I have quite bushy eyebrows so for me 2 strokes of the pencil was enough to maintain a natural but stylish look, for thinner eyebrows you should shape accordingly. Ideally you want the inner part of your brow to be thicker, then taper to a thinner line as it goes toward your temple.
5. I then used the smudge part of my pencil (or the brush) ,to smooth over my brows and blend in the pencil.
7. Because my hair is distinctively dark and so are my eyebrows I used a little bit of Bourjous mascara to lighten my eyebrows.
6. This is optional but you could use a nude lighter shade of an eye-shadow palette to highlight your brow underneath.For instance the nude colors in the Naked 2 palette would be perfect. I used a concealer to just roughly blend underneath my brow bones.
7. Just to finish off I applied a little splash of powder over my eyebrows to give it a fresher and natural look ! I used a loose foundation powder but it doesn’t really matter which one you use just that it should not darken or lighten the eyebrows just give it a hint of freshness.
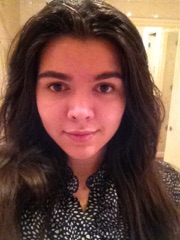
8. Thats it ! I hope you enjoyed the mini tutorial that I created 🙂 Here is the final look
Here are some photos of the products that I used 🙂
Thank you for reading my post, If you have any thoughts or comments on this post or any of my previous posts please feel free to comment below. If you felt that I did not live up to your expectations please tell me how to too. Don`t forget to comment, like and share.
Follow me on Instagram :Elizasbeautybox
Lots of Love E xx


